Learn how to install a new basement window with our comprehensive step-by-step guide in Hurst, TX. Perfect for DIY enthusiasts and professionals alike.
Adding or replacing a basement window can completely transform your space, offering improved natural light, better ventilation, and enhanced energy efficiency. But how to install a new basement window can vary depending on your goals—whether upgrading an old window, installing one in a solid wall, or adding an egress window for safety compliance. Each project comes with unique steps, but with the right tools and planning, you can tackle this DIY project confidently.
This guide provides everything you need, from assessing your basement’s structure and choosing the right materials to installing and sealing the window properly. Whether you’re aiming for a simple replacement or a new installation, these step-by-step instructions will help you achieve professional results. Keep reading to learn how to brighten and modernize your basement while adding value to your home in Hurst, TX.
Preparation: Setting Up for Success
Assessing Your Needs
The first step in any basement window project is understanding your goals. Are you replacing a damaged window for improved insulation, installing a new one to brighten your basement, or adding an egress window to comply with safety codes? Each project type comes with specific requirements, and understanding these will help you prepare appropriately.
If your focus is energy efficiency, opt for durable and low-maintenance materials like vinyl or fiberglass. Learn more about high-quality window replacement options to choose the best fit for your needs.
Gathering Tools and Supplies
Preparation is the foundation of success. Gather the tools and materials you’ll need based on the type of installation:
Tools for Replacing a Basement Window
- Measuring tape
- Utility knife
- Pry bar
- Caulking gun
- Shims
- Weather-resistant barrier
Tools for Installing a New Window
- Measuring tape
- Concrete saw or masonry tools
- Flashing tape
- Drill or screwdriver
- Foam insulation or caulk
Tools for Egress Window Installation
- Concrete saw
- Heavy-duty bolts
- Window well
- Gravel
High-quality materials like James Hardie siding can elevate your basement window project, enhancing energy efficiency and exterior appeal.
Step-by-Step Instructions: Tailored to Your Project
When installing a basement window, the steps will vary depending on whether you’re replacing an existing window, installing a completely new one, or adding an egress window to meet safety standards. Below are detailed instructions for each scenario, along with specific considerations to ensure a successful project.
Case 1: Replacing a Basement Window
Replacing a damaged or outdated basement window is a relatively straightforward process. This project involves removing the existing window, preparing the opening, and installing a new one that improves insulation, aesthetics, and functionality. Proper sealing is crucial to avoid drafts and water infiltration.
Step 1: Remove the Old Window
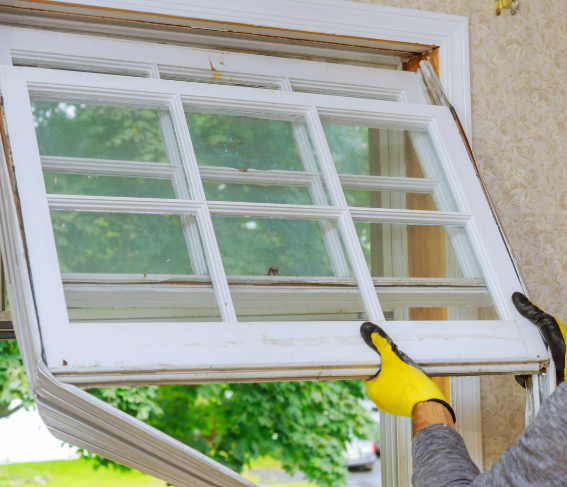
Using a utility knife, carefully cut through any paint or caulk sealing the frame. Then, using a pry bar, loosen the window without damaging the surrounding wall. Inspect the opening for rot or cracks and clean it thoroughly.
Step 2: Prepare the Opening
Level the opening using shims and apply a weather-resistant barrier to block moisture. This step is vital for areas prone to heavy rain or snow.
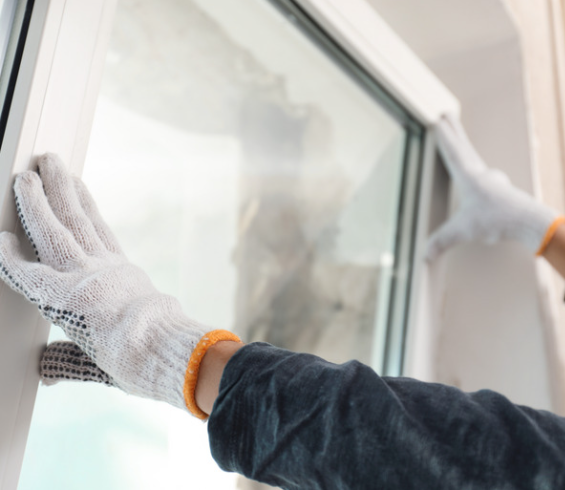
Step 3: Install the New Window
Position the new window in the frame, ensuring it’s level. Secure it using screws or nails, then seal the edges with caulk or foam insulation to prevent drafts. Test the window’s functionality before finalizing.
Case 2: Installing a New Basement Window (No Previous Window Exists)
Installing a new basement window in a solid wall requires more effort than replacing one. This process involves cutting through the foundation, preparing the frame, and sealing the new window securely. It’s a great way to add natural light and ventilation to a previously dark space.
Step 1: Mark and Measure the Opening
Use a measuring tape to outline the window dimensions on the wall. This ensures an accurate and professional finish.
Step 2: Cut Through the Wall
Carefully use a concrete saw to cut the opening. Work slowly to avoid damage to the surrounding wall. Clean the edges thoroughly to ensure a snug fit for the window.
Step 3: Prepare the Frame

Install a weather-resistant barrier and flashing tape around the opening to protect against moisture. Level the frame with shims to create a solid base.
Step 4: Place and Seal the Window
Insert the window, ensuring it’s aligned properly. Secure it with heavy-duty screws, then seal the edges with foam insulation or caulk. Double-check the alignment by opening and closing the window several times.
Case 3: Adding an Egress Basement Window
Adding an egress window enhances safety by providing an emergency exit and increases the natural light in your basement. The process requires cutting a larger opening, installing a window well, and ensuring compliance with building codes.
Step 1: Select the Location
Ensure the location meets local building codes for size and accessibility. An ideal location is a well-lit area that maximizes natural light.
Step 2: Install the Window Well
Position the window well around the exterior opening. Secure it with bolts and fill the bottom with gravel to improve drainage. Learn about contacting experts for professional advice if needed.
Step 3: Place and Secure the Window
Insert the egress window into the prepared opening. Seal the edges with caulk to block drafts and prevent water infiltration. Confirm the window opens easily and complies with emergency escape standards.
Enhancing Your Basement’s Exterior
Installing or upgrading a basement window can be an opportunity to enhance your home’s exterior. Complement your new window with vinyl siding or Celect siding for a durable and modern look. These materials elevate your home’s appearance and offer low-maintenance solutions for lasting beauty.
Expert Tips for a Seamless Installation
Plan for Weather
Weather conditions can significantly impact the success of your window installation. Choose a dry day with minimal humidity to avoid issues like moisture infiltration, which can compromise the sealant and frame durability. Wet or rainy conditions can also make it harder to achieve a proper fit, leading to delays or the need for repairs. If you’re uncertain about timing, consult experts near you for guidance.
Use Quality Sealants
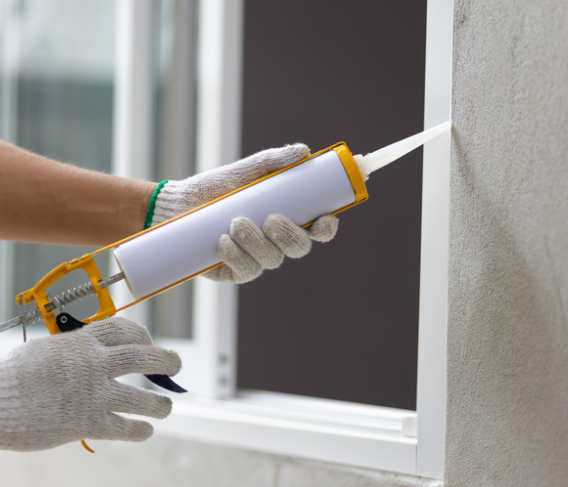
Sealants are your first line of defense against drafts, leaks, and energy loss. High-quality caulk or foam insulation effectively seals gaps around the window frame. Poor-quality materials may crack or wear out over time, leading to costly repairs. For an energy-efficient and durable result, consider options recommended by window replacement professionals.
Follow Codes
Building codes exist to ensure safety and functionality, especially for egress windows. Failure to adhere to these codes can result in fines, complications during home resale, or even safety hazards. Research local regulations before starting your project, and don’t hesitate to reach out for assistance if needed.
Common Challenges and How to Avoid Them
Improper Sealing
Windows that aren’t sealed correctly can allow water and air to penetrate, leading to structural damage and increased energy costs. Over time, moisture infiltration can cause rot and mold and even compromise the frame’s integrity. To avoid these issues, use premium caulk or foam insulation and apply it evenly around the window’s edges. Smooth out any gaps or bubbles to create a consistent and durable seal.
Cutting Errors
Accurate measurements and precise cutting are essential for a professional-looking installation. A poorly measured or cut opening can result in an ill-fitting window, which may require costly corrections. To avoid this mistake, measure the space multiple times and mark your dimensions clearly before cutting. If you’re working with masonry, use tools like a concrete saw to achieve clean, precise lines. For extra assurance, consider consulting window replacement experts for help with accurate preparation.
Tools and Materials Recap
For Replacing a Basement Window
- Utility knife
- Pry bar
- Caulking gun
For Installing a New Basement Window
- Concrete saw
- Flashing tape
For Egress Window Installation
- Window well
- Gravel
FAQs: What You Should Know
Can you add a window to an existing basement?
Yes, adding a window to an existing basement is possible. It involves cutting through the foundation, ensuring structural integrity, and waterproofing the new opening. The process also requires adherence to building codes, especially for egress windows used for emergency safety.
What type of basement window is best?
Casement windows are often the best choice for basements due to their ease of operation and excellent ventilation. Hopper windows are another good option, especially for smaller spaces, as they open inward and are effective for light and airflow.
Are basement windows a good idea?
Basement windows are excellent as they improve natural lighting, ventilation, and emergency egress options. They can make a basement feel more like a livable space while adding value to your home. Proper installation and waterproofing are key to avoiding issues.
Is it difficult to replace basement windows?
Replacing basement windows can be challenging due to limited access and the need for waterproofing. It requires careful measurements, fitting the new window properly, and sealing gaps to prevent leaks. Hiring a professional ensures the job is done efficiently and correctly.
How long do basement windows last?
Basement windows typically last 15-30 years, depending on the material and exposure to moisture. Regular inspections and timely maintenance, such as sealing leaks or repainting, can extend their lifespan and maintain their functionality.
Conclusion
Installing a new basement window can significantly enhance your home’s comfort, energy efficiency, and aesthetics. Whether you’re replacing an old window, installing a completely new one, or adding an egress window for safety, careful planning and execution are vital. By following these detailed instructions and exploring resources like window replacement services or requesting a free quote, you can transform your basement into a bright and welcoming space. Don’t hesitate to take the next step in elevating your home’s value and functionality.
End Notes
Installing a new basement window can make a world of difference, bringing in natural light and improving ventilation. At Hurst Siding & Windows Experts, we understand the unique challenges of basement window installation and are here to ensure the process is smooth and efficient.
Explore our window replacement services and see how we can help you upgrade your basement space. Curious about other ways to enhance your home? Check out our premium siding options, including James Hardie, vinyl siding, and Celect siding. Visit our website to learn more about us and our commitment to quality. Contact us today via our free quote form or reach out to discuss your project. Let’s bring more light and life to your basement!


0 Comments